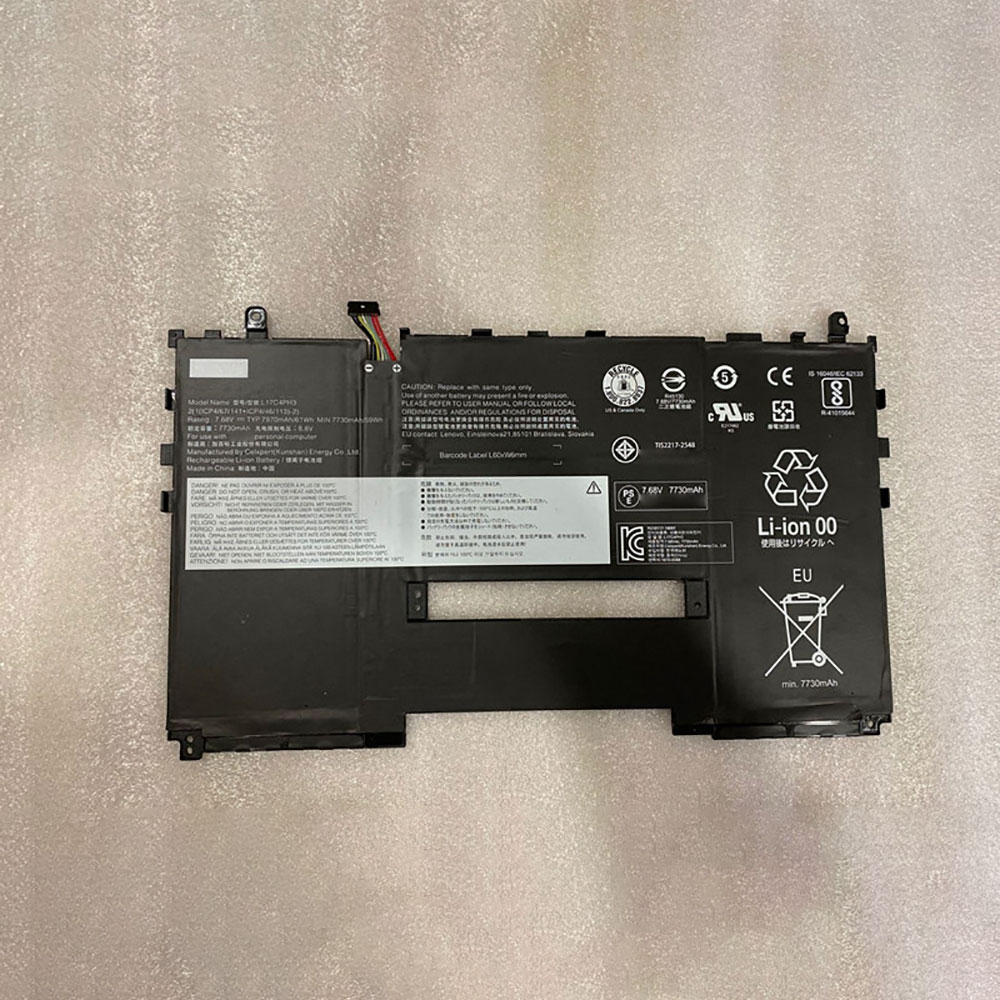
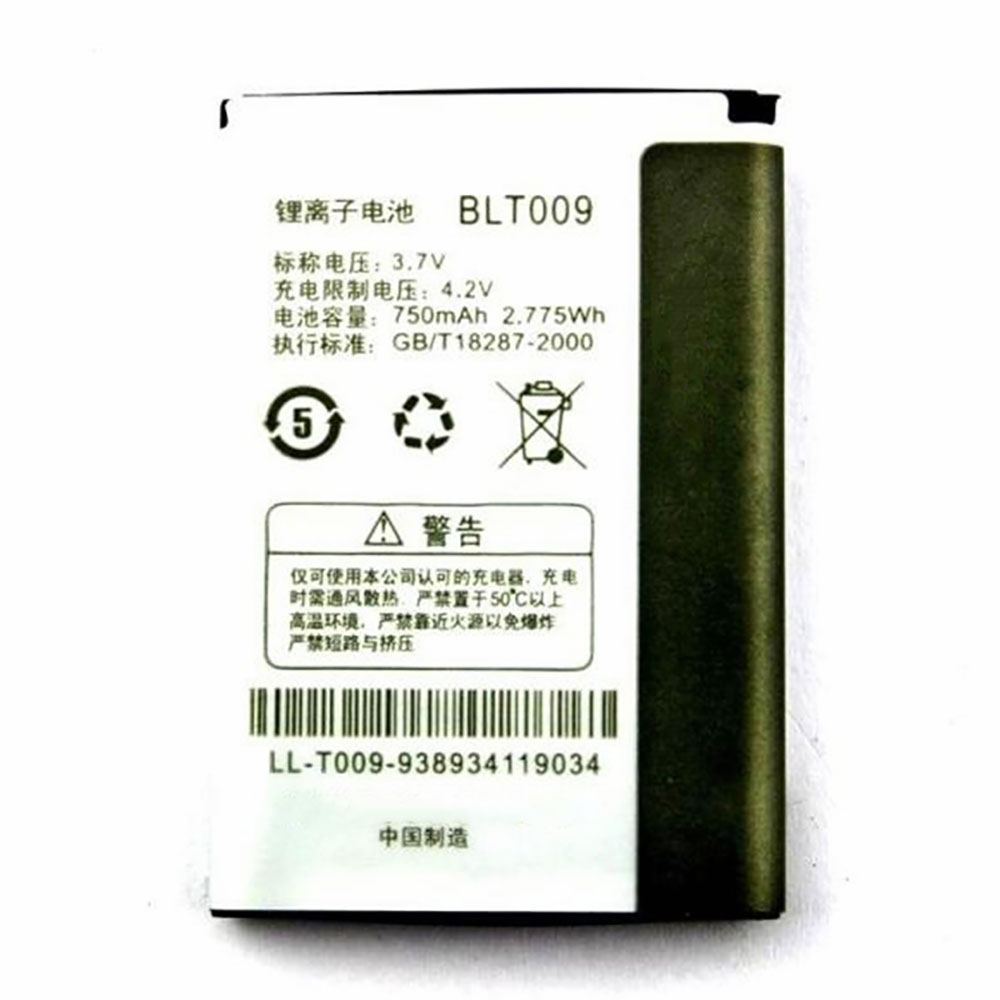
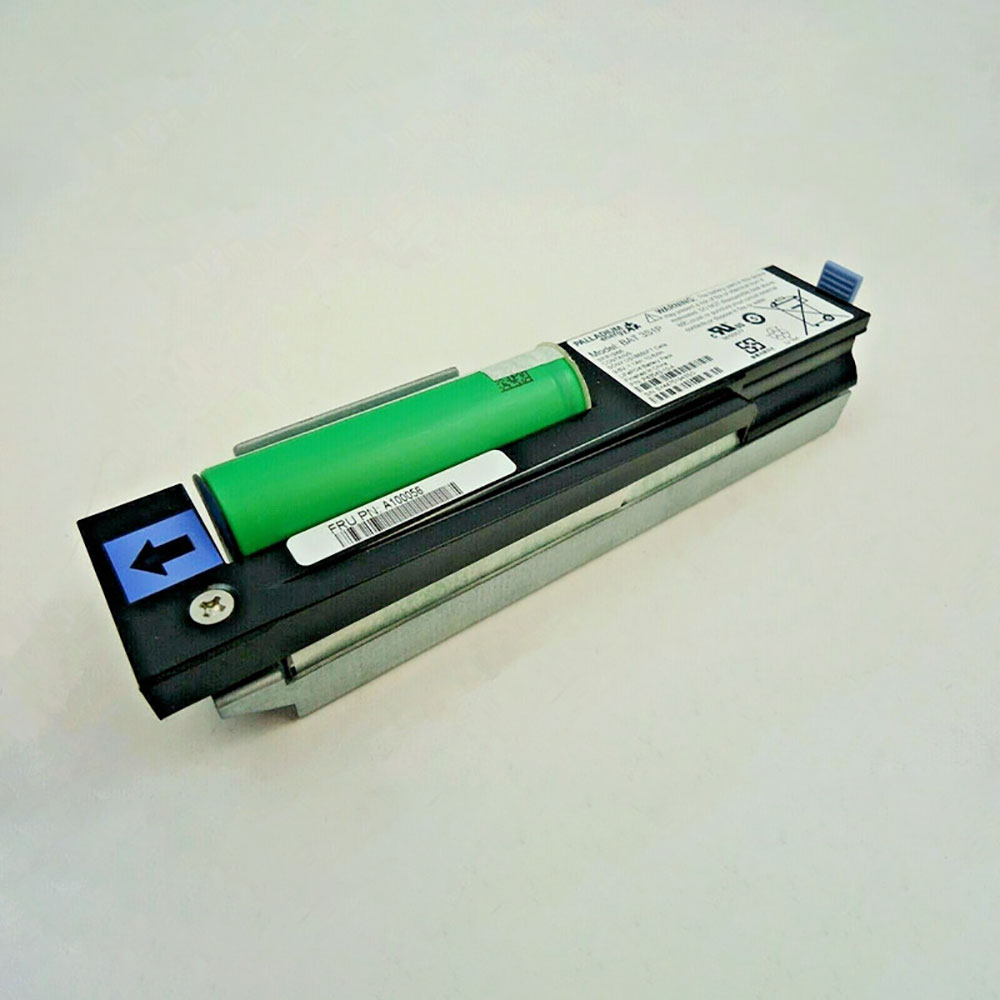
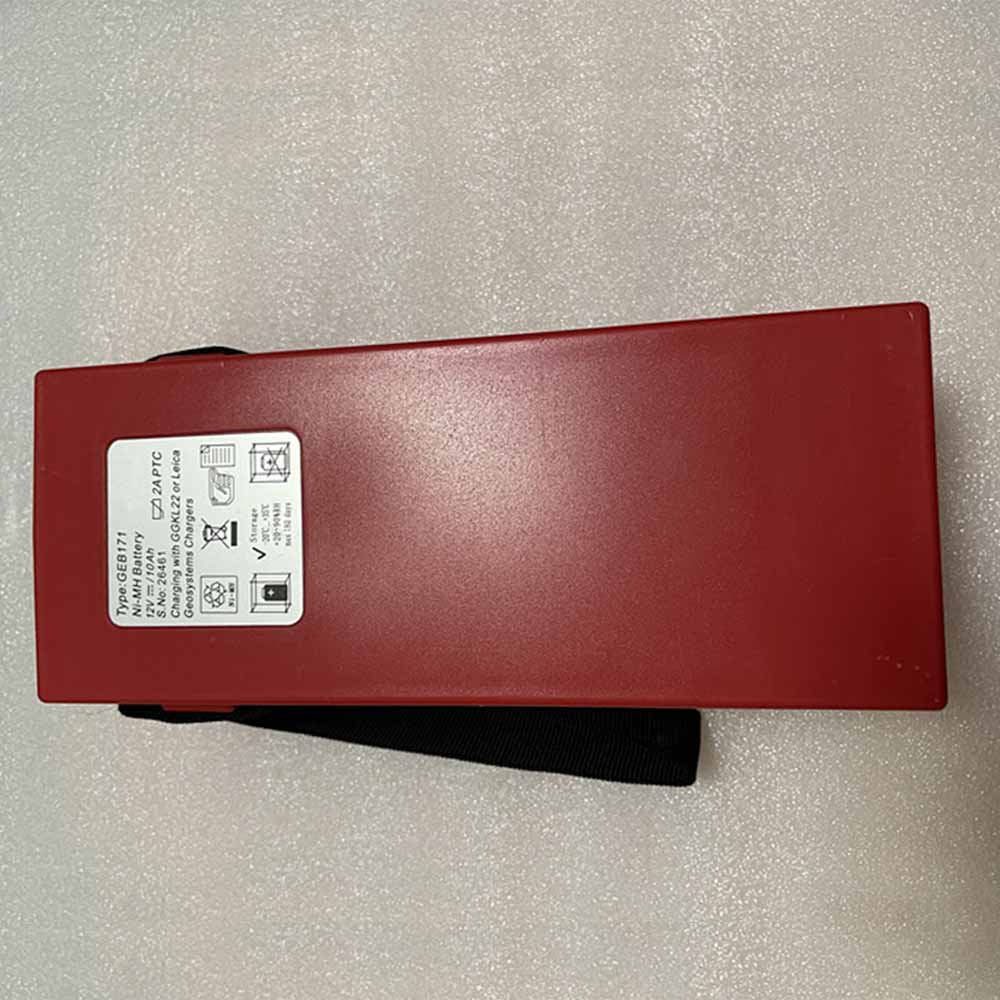
Battery AP18E7M Replacement For acer laptop Acer Nitro 5 AN515-43 AN515-53 AN515-54 AN517-51

Find the right battery for Acer Nitro 5 AN515-43 AN515-53 AN515-54 AN517-51 to solve your power issues. Our acer AP18E7M batteries are manufactured to precisely fit just as your original battery.

We use the highest quality Li-ion cells and components that are lighter weight, charge faster and last longer.

US acer battery shop – Tech-Battery.com ! Shopping with us is safe and secure! 100% Guarantee Quality and Fully Test!

acer AP18E7M Battery For acer – Battery For acer laptop Li-ion 3815mAh/58.75Wh 15.4V. Browse our various categories and find out why we have been the go-to source for our customers.

AP18E7M
  • Chemistry: Li-ion
  • Voltage: 3815mAh/58.75Wh
  • Capacity: 15.4V

Free shipping in most countries. click here to view detailed shipping costs.

We ship to the worldwide,please enquiry shipping & handling if you are out of united states.

What’s the total delivery time? (please use this formula to determine when your order will arrive) total delivery time = packaging time + shipping time.

Replaces the following products:

Fits the following devices:

ACER
Aspire 7 A715-74G, 7 A715-74G-50U5, 7 A715-74G-51QJ, 7 A715-74G-52B0, 7 A715-74G-52BP, 7 A715-74G-53DG, 7 A715-74G-53YM, 7 A715-74G-544W, 7 A715-74G-56VU, 7 A715-74G-57GR, Aspire 7 A715-74G-59DN, 7 A715-74G-702T, 7 A715-74G-70T9, 7 A715-74G-71WS, 7 A715-74G-72GL, 7 A715-74G-73BV, 7 A715-74G-73M5, 7 A715-74G-73R3, 7 A715-74G-75FB, 7 A715-74G-75NZ, ASPIRE 7 A715-74G-75QA, 7 A715-74G-7602, 7 A715-74G-76NV, 7 A715-74G-76PW, 7 A715-74G-77AW, 7 A715-74G-77PA, 7 A715-74G-77QL, 7 A715-74G-77UR, 7 A715-74G-782K, 7 A715-74G-785A, Aspire 7 A715-74g-792d, 7 A715-74G-792U, 7 A715-74G-79EJ, 7 A715-74G-79KJ, 7 A715-74G-79MQ, AN517-51, AN517-51-56EU, AN517-51-57X5, AN517-51-70C7, AN517-51-70ND, ASPIRE AN517-51-714J, AN517-51-71D5, AN517-51-720H, AN517-51-757H, AN517-51-75RY, AN517-51-7887, NITRO 5 A517-51-51XT, Nitro 5 AN515-54, Nitro 5 AN515-54-53Z2, Nitro 5 AN515-54-57LV, Aspire Nitro 5 AN515-54-78TL, NITRO 5 AN517-51-515S, NITRO 5 AN517-51-52CK, NITRO 5 AN517-51-54WS, NITRO 5 AN517-51-56EU, NITRO 5 AN517-51-56YW, NITRO 5 AN517-51-57EG, NITRO 5 AN517-51-57NL, NITRO 5 AN517-51-57X5, NITRO 5 AN517-51-59D9, ASPIRE NITRO 5 AN517-51-59ZT, NITRO 5 AN517-51-70ND, NITRO 5 AN517-51-71D5, NITRO 5 AN517-51-7201, NITRO 5 AN517-51-720H, NITRO 5 AN517-51-72GC, NITRO 5 AN517-51-72T9, NITRO 5 AN517-51-72ZZ, NITRO 5 AN517-51-739K, NITRO 5 AN517-51-754T, ASPIRE NITRO 5 AN517-51-757H, NITRO 5 AN517-51-75RY, NITRO 5 AN517-51-75VU, NITRO 5 AN517-51-75X3, NITRO 5 AN517-51-75Y2, NITRO 5 AN517-51-76UV, NITRO 5 AN517-51-777Y, NITRO 5 AN517-51-77B8, NITRO 5 AN517-51-77M5, NITRO 5 AN517-51-77Q0, ASPIRE NITRO 5 AN517-51-77QJ, NITRO 5 AN517-51-77T2, NITRO 5 AN517-51-7887, NITRO 5 AN517-51-78MC, Nitro 7 AN715-51, Nitro 7 AN715-51-71HA, Nitro 7 AN715-51-726G, Nitro 7 AN715-51-76SY, Nitro 7 AN715-51-77D0, NITRO 7 AN715-51-79NX, ConceptD 3 CN315-71, ConceptD 3 CN315-71-003, ConceptD 3 CN315-71-005, ConceptD 3 CN315-71-514V, ConceptD 3 CN315-71-59SB, ConceptD 3 CN315-71-70C5, ConceptD 3 CN315-71-72AM, ConceptD 3 CN315-71-72J3, ConceptD 3 CN315-71-76MR, Conceptd 3 CN315-71-7891, Conceptd 3 Cn315-71-791U, ConceptD 3 CN315-71-79QM, ConceptD 3 CN315-71-79VR, ConceptD 3 CN315-71P-7341, ConceptD 3 CN315-71P-74AC, conceptd 3 CN315-71P-77A0, ConceptD 3 Pro CN315-71P, ConceptD 3 Pro CN315-71P-55AD, ConceptD 3 Pro CN315-71P-59QP, ConceptD 3 Pro CN315-71P-72PM, ConceptD 3 Pro CN315-71P-7341, ConceptD 3 Pro CN315-71P-73W1, ConceptD 3 Pro CN315-71P-746A, ConceptD 3 Pro CN315-71P-74AC, ConceptD 3 Pro CN315-71P-760X, ConceptD 3 Pro CN315-71P-7695, ConceptD 3 Pro CN315-71P-769Y, ConceptD 3 Pro CN315-71P-77A0, ConceptD 3 Pro CN315-71P-780K, ConceptD 3 Pro CN315-71P-78QP, ConceptD 3 Pro CN315-71P-79C6, ConceptD 5 CN517-71, ConceptD 5 CN517-71-70R8, ConceptD 5 CN517-71-72HS, ConceptD 5 CN517-71-73JD, ConceptD 5 CN517-71-74YA, ConceptD 5 CN517-71-75ZU, ConceptD 5 CN517-71-769B, ConceptD 5 CN517-71-76FU, ConceptD 5 CN517-71-77UB, ConceptD 5 Cn517-71-7824, ConceptD 5 CN517-71-7824P, ConceptD 5 CN517-71-78BD, ConceptD 5 CN517-71-79S7, ConceptD 5 CN517-71-79XL, ConceptD 5 Pro 17, ConceptD 5 Pro CN515-71P-75FQ, ConceptD 5 Pro CN517-71P, ConceptD 5 Pro CN517-71P-70SZ, ConceptD 5 Pro CN517-71P-72T0, ConceptD 5 Pro CN517-71P-72XU, ConceptD 5 Pro CN517-71P-7388, ConceptD 5 Pro CN517-71P-753A, ConceptD 5 Pro CN517-71P-75WN, ConceptD 5 Pro CN517-71P-76BH, ConceptD 5 Pro CN517-71P-76BZ, ConceptD 5 Pro CN517-71P-77RU, Nitro 5 AN515-54, Nitro 5 AN515-54-51M5, Nitro 5 AN515-54-530D, Nitro 5 AN515-54-54ZK, Nitro 5 AN515-54-5692, Nitro 5 AN515-54-57LV, Nitro 5 AN515-54-59WX, Nitro 5 AN515-54-71UP, Nitro 5 AN515-54-72B7, Nitro 5 AN515-54-72J1, Nitro 5 AN515-54-735S, NITRO 5 AN515-54-73P5, Nitro 5 AN515-54-74BV, Nitro 5 AN515-54-74NF, Nitro 5 AN515-54-74YP, Nitro 5 AN515-55, Nitro 5 AN515-55-729Y, Nitro 5 AN515-55-72MF, Nitro 5 AN517-51, NITRO 5 AN517-51-51YA, NITRO 5 AN517-51-55B9, Nitro 5 AN517-51-56YW, Nitro 5 AN517-51-576U, NITRO 5 AN517-51-57NL, NITRO 5 AN517-51-57V5, Nitro 5 AN517-51-57X5, Nitro 5 AN517-51-58AD, Nitro 5 AN517-51-58QJ, Nitro 5 AN517-51-58TZ, Nitro 5 AN517-51-59D9, Nitro 5 AN517-51-70ND, Nitro 5 AN517-51-71D5, Nitro 5 AN517-51-71S6, Nitro 5 AN517-51-7201, NITRO 5 AN517-51-723Y, Nitro 5 AN517-51-73RV, NITRO 5 AN517-51-754T, Nitro 5 AN517-51-757H, Nitro 5 AN517-51-75RY, Nitro 5 AN517-51-76FT, Nitro 5 AN517-51-76UV, Nitro 5 AN517-51-77B8, Nitro 5 AN517-51-77M5, NITRO 5 AN517-51-77P6, Nitro 5 AN517-51-782J, Nitro 5 AN517-51-7887, Nitro 5 AN517-51-78MC, Nitro 5 AN517-51-797S, Nitro 5 AN517-51-79C9, Nitro 7 AN715-51, Nitro 7 AN715-51-51GR, Nitro 7 AN715-51-574Z, Nitro 7 AN715-51-58X1, Nitro 7 AN715-51-70D5, Nitro 7 AN715-51-70TG, Nitro 7 AN715-51-7171, Nitro 7 AN715-51-71DE, Nitro 7 AN715-51-73BU, Nitro 7 AN715-51-74S3, Nitro 7 AN715-51-752B, Nitro 7 AN715-51-75FZ, NITRO 7 AN715-51-75FZ GAMING, Nitro 7 AN715-51-75N8, Nitro 7 AN715-51-75WR, NITRO 7 AN715-51-76B7, Nitro 7 AN715-51-76ML, Nitro 7 AN715-51-76T7, Nitro 7 AN715-51-76YF, Nitro 7 AN715-51-773J, Nitro 7 AN715-51-773L, Nitro 7 AN715-51-77D0, Nitro 7 AN715-51-77FG, Nitro 7 AN715-51-786X, Nitro 7 AN715-51-79Y2, NITRO AN715-51-71HA, Predator Helios 300 PH315-52, Predator Helios 300 PH315-52-558P, Predator Helios 300 PH315-52-5807, Predator Helios 300 PH315-52-58EG, Predator Helios 300 PH315-52-59CY, Predator Helios 300 PH315-52-704J, Predator Helios 300 PH315-52-707V, Predator Helios 300 PH315-52-708C, Predator Helios 300 PH315-52-713C, Predator Helios 300 PH315-52-718Q, Predator Helios 300 PH315-52-71HH, Predator Helios 300 PH315-52-71RT, Predator Helios 300 PH315-52-7210, Predator Helios 300 PH315-52-72EV, Predator Helios 300 PH315-52-72RG, Predator Helios 300 PH315-52-73P3, Predator Helios 300 PH315-52-73PA, Predator Helios 300 PH315-52-73XY, Predator Helios 300 PH315-52-746Q, Predator Helios 300 PH315-52-74XE, Predator Helios 300 PH315-52-74XZ, Predator Helios 300 PH315-52-754M, Predator Helios 300 PH315-52-75VP, Predator Helios 300 PH315-52-766X, Predator Helios 300 PH315-52-77EK, Predator Helios 300 PH315-52-77YA, Predator Helios 300 PH315-52-78HH, Predator Helios 300 PH315-52-78T7, Predator Helios 300 PH315-52-78VL, Predator Helios 300 PH315-52-78XW, Predator Helios 300 PH315-52-794X, Predator Helios 300 PH315-52-79H2, Predator Helios 300 PH315-52-79H8, Predator Helios 300 PH315-52-79TY, Predator Helios 300 PH315-52-79ZD, PREDATOR HELIOS 300 PH317-52-53KY, Predator Helios 300 PH317-53, PREDATOR HELIOS 300 PH317-53-70E6, PREDATOR HELIOS 300 PH317-53-716R, PREDATOR HELIOS 300 PH317-53-71D6, PREDATOR HELIOS 300 PH317-53-7222, PREDATOR HELIOS 300 PH317-53-72H9, PREDATOR HELIOS 300 PH317-53-72P5, PREDATOR HELIOS 300 PH317-53-738G, PREDATOR HELIOS 300 PH317-53-74KK, PREDATOR HELIOS 300 PH317-53-75SY, PREDATOR HELIOS 300 PH317-53-7777, PREDATOR HELIOS 300 PH317-53-77N4, PREDATOR HELIOS 300 PH317-53-77NT, PREDATOR HELIOS 300 PH317-53-78G0, PREDATOR HELIOS 300 PH317-53-78JX, PREDATOR HELIOS 300 PH317-53-790P, PREDATOR HELIOS 300 PH317-53-79JM, PREDATOR HELIOS 300 PH317-53-79S0, PREDATOR HELIOS 300 PH317-53-79Y1, Predator Helios 300-PH315-52-74NQ, PREDATOR HELIOS 300-PH317-53-76VZ, PREDATOR HELIOS 300-PH317-53-77ZX, Predator Triton 300 PT315-51, Predator Triton 300 PT315-51-51SG, Predator Triton 300 PT315-51-539R, Predator Triton 300 PT315-51-544M, Predator Triton 300 PT315-51-56W4, Predator Triton 300 PT315-51-58BG, Predator Triton 300 PT315-51-58VY, Predator Triton 300 PT315-51-597Z, Predator Triton 300 PT315-51-70E9, Predator Triton 300 PT315-51-740T, Predator Triton 300 PT315-51-74M0, Predator Triton 300 PT315-51-75DV, Predator Triton 300 PT315-51-762F, Predator Triton 300 PT315-51-76B3, Predator Triton 300 PT315-51-76VK, Predator Triton 300 PT315-51-7815, Predator Triton 300 PT315-52, Predator Triton 300 PT315-52-720T, Predator Triton 300 PT315-52-79LP

acer AP18E7M acer battery is replacement for Acer Nitro 5 AN515-43 AN515-53 AN515-54 AN517-51. The AP18E7M batteries equivalent is guaranteed to meet or exceed acer original specifications. All acer AP18E7M Battery are brand new, 1 year Warranty, 100% Guarantee Quality and Fully Test!

We deliver quality acer laptop extended batteries online. Purchase your acer laptop battery here.

acer AP18E7M acer Batteries

  • 100% OEM Compatible with your acer laptop.
  • Lithium Ion battery technology
  • Convenient and secure online purchasing
  • Dependable high quality acer batteries
  • Satisfaction guaranteed or your money back
  • 1 Year Warranty on all acer laptop Replacement Batteries

6 tips to increase AP18E7M acer Battery lifetime

The performance of your acer depends largely on the performance of your battery. And his time of life depends on its users, and that you are. These are the principles that have guided the acer , at the head, so you can optimize the performance of acer laptop battery.
New battery still fully charged AP18E7M sold. You must be on the first wheel to be conditioned for optimum performance. Loading and unloading of the battery 4 or 5 times is enough to determine.
The memory effect completely to avoid a full charge and discharge the battery, acer AP18E7M twice a month.
The dirt on the acer AP18E7M contacts of the battery can power the acer laptop batteries. Clean with alcohol and cotton can look like and function like new.
This method is recommended for those using the AC adapter for long periods. We recommend that you use the acer AP18E7M battery at least once in two weeks. Batteries lose its charge when stored for a long time and you need the battery if it does break.
If he does not use a length of time, the acer AP18E7M battery will be stored protected from a clean, dry and cool, heat and other metals. A loss of business to charge the battery in time and need a break before reuse.
Power Management Features Battery AP18E7M enable the conservation of energy in the battery of acer laptop. You can control the speed of the processor off, or you can adjust the brightness of the LCD screen to a minimum to ensure low power consumption. 

Why we have been the go-to source for our customers ?

We stock a wide range of rechargeable batteries for acer laptop. Your acer Tablet PC is part of your everyday life. Successful communications on a acer begin with your battery. When purchasing a replacement battery for your acer acer, dependability and price are what we have to offer. We’ve been supplying reliable, high quality acer batteries for over 10 years. Our goal is to provide high quality aftermarket replacement batteries at a very reasonable price. All of our rechargeable Li-Ion acer batteries are backed by a one year warranty.

What is the run time of acer battery?

acer batteries have two main ratings on them: Volts and Amperes. Because size and weight of batteries is limited when compared to larger batteries such as car batteries, most companies show their ratings with Volts and Milliamperes. One thousand Milliamperes equals 1 Ampere. When buying a battery, select batteries with the most Milliamperes (or mAh). Batteries are also rated by Watt-Hours, perhaps the simplest rating of all. This is found by multiplying the Volts and the Amperes together. For example:

  • 14.4 Volts, 4000mAh (Note: 4000mAh is equal to 4.0 Amperes).
  • 14.4 x 4.0 = 57.60 Watt-Hours

Watt-Hours signifies the energy needed to power one watt for one hour.

Battery RZ09-0168 Replacement For RAZER laptop Razer Blade Stealth 12.5 RC30-01962E53 RZ09-01682E24

Find the right battery for Razer Blade Stealth 12.5 RC30-01962E53 RZ09-01682E24 to solve your power issues. Our RAZER RZ09-0168 batteries are manufactured to precisely fit just as your original battery.

We use the highest quality Li-ion cells and components that are lighter weight, charge faster and last longer.

US RAZER battery shop – Tech-Battery.com ! Shopping with us is safe and secure! 100% Guarantee Quality and Fully Test!

RAZER RZ09-0168 Battery For RAZER – Battery For RAZER laptop Li-ion 3950mAh/45Wh 11.4V/11.55V. Browse our various categories and find out why we have been the go-to source for our customers.

RZ09-0168
  • Chemistry: Li-ion
  • Voltage: 3950mAh/45Wh
  • Capacity: 11.4V/11.55V

Free shipping in most countries. click here to view detailed shipping costs.

We ship to the worldwide,please enquiry shipping & handling if you are out of united states.

What’s the total delivery time? (please use this formula to determine when your order will arrive) total delivery time = packaging time + shipping time.

Replaces the following products:

Fits the following devices:

Razer
RZ09-01682E24, RZ09-01962E53, razer blade stealth 7th gen i7, RAZER Blade Stealth 2017, razer blade stealth 12.5

RAZER RZ09-0168 RAZER battery is replacement for Razer Blade Stealth 12.5 RC30-01962E53 RZ09-01682E24. The RZ09-0168 batteries equivalent is guaranteed to meet or exceed RAZER original specifications. All RAZER RZ09-0168 Battery are brand new, 1 year Warranty, 100% Guarantee Quality and Fully Test!

We deliver quality RAZER laptop extended batteries online. Purchase your RAZER laptop battery here.

RAZER RZ09-0168 RAZER Batteries

  • 100% OEM Compatible with your RAZER laptop.
  • Lithium Ion battery technology
  • Convenient and secure online purchasing
  • Dependable high quality RAZER batteries
  • Satisfaction guaranteed or your money back
  • 1 Year Warranty on all RAZER laptop Replacement Batteries

6 tips to increase RZ09-0168 RAZER Battery lifetime

The performance of your RAZER depends largely on the performance of your battery. And his time of life depends on its users, and that you are. These are the principles that have guided the RAZER , at the head, so you can optimize the performance of RAZER laptop battery.
New battery still fully charged RZ09-0168 sold. You must be on the first wheel to be conditioned for optimum performance. Loading and unloading of the battery 4 or 5 times is enough to determine.
The memory effect completely to avoid a full charge and discharge the battery, RAZER RZ09-0168 twice a month.
The dirt on the RAZER RZ09-0168 contacts of the battery can power the RAZER laptop batteries. Clean with alcohol and cotton can look like and function like new.
This method is recommended for those using the AC adapter for long periods. We recommend that you use the RAZER RZ09-0168 battery at least once in two weeks. Batteries lose its charge when stored for a long time and you need the battery if it does break.
If he does not use a length of time, the RAZER RZ09-0168 battery will be stored protected from a clean, dry and cool, heat and other metals. A loss of business to charge the battery in time and need a break before reuse.
Power Management Features Battery RZ09-0168 enable the conservation of energy in the battery of RAZER laptop. You can control the speed of the processor off, or you can adjust the brightness of the LCD screen to a minimum to ensure low power consumption. 

Why we have been the go-to source for our customers ?

We stock a wide range of rechargeable batteries for RAZER laptop. Your RAZER Tablet PC is part of your everyday life. Successful communications on a RAZER begin with your battery. When purchasing a replacement battery for your RAZER RAZER, dependability and price are what we have to offer. We’ve been supplying reliable, high quality RAZER batteries for over 10 years. Our goal is to provide high quality aftermarket replacement batteries at a very reasonable price. All of our rechargeable Li-Ion RAZER batteries are backed by a one year warranty.

What is the run time of RAZER battery?

RAZER batteries have two main ratings on them: Volts and Amperes. Because size and weight of batteries is limited when compared to larger batteries such as car batteries, most companies show their ratings with Volts and Milliamperes. One thousand Milliamperes equals 1 Ampere. When buying a battery, select batteries with the most Milliamperes (or mAh). Batteries are also rated by Watt-Hours, perhaps the simplest rating of all. This is found by multiplying the Volts and the Amperes together. For example:

  • 14.4 Volts, 4000mAh (Note: 4000mAh is equal to 4.0 Amperes).
  • 14.4 x 4.0 = 57.60 Watt-Hours

Watt-Hours signifies the energy needed to power one watt for one hour.

Razer BlackShark V2 Review

When it comes to esports, accuracy and precision are important, and having great audio with an excellent soundstage is a vital part of that. That’s where esports gaming headsets like the Razer BlackShark V2 come in handy.A follow-up to the glossier BlackShark, which has been lauded for its comfort, great sound quality, and cool design, this successor has a more subdued look and not much in the way of frills and thrills. But, that’s only because it’s honed in on the way it lets you experience audio in gaming instead. It’s hitting the shelves with three new technologies either developed or co-developed by Razer and THX. These include the THX Spatial Audio, which essentially offers THX Competitive Mode for some of the most popular games out there, as well as the new Razer Triforce Titanium 50mm drivers, which are made up of three parts – each for the highs, mids and lows.

The result is a terrific gaming headset that sounds great and boasts a soundstage incredible enough to give you an actual competitive edge in gaming.
Design and Features

Light weight and comfort take center stage in the BlackShark V2’s design. Perhaps the first thing you’ll notice about this pair of headphones – aside from its Razer green trimmings – is how light it is. At 262g, it’s among the lightest offerings out there, with the HyperX Cloud Stinger following closely at 275g and the SteelSeries Arctis 5 at 280g. This certainly matters, as being this lightweight considerably reduces the wearer’s fatigue and makes your gaming experience that much more comfortable. If you expect to be playing for hours on end, it makes a huge difference.

That light weight makes it a bit more travel-friendly, too, though the headset itself isn’t exactly designed for travel. It’s not foldable and not exactly compact, though it does have its own travel bag, so its super light weight certainly helps make it easier to tote with you when traveling or commuting.

Don’t take its lightweightness to mean that it isn’t made of quality materials, however. The ear cups look to be made of high quality, albeit light, plastic with a matte finish (a departure from its predecessor’s glossy finish), and they don’t feel like they would crack if a sudden heavy weight was applied. The headband is lined on top with plush leatherette, giving it a sophisticated flair, and the removable mic comes with a super flexible stem that also feels solid.

Finally, the headband and ear cushions are made of memory foam and wrapped in flow knit fabric. These cushions also add to comfort here, as not only is there a generous thickness to them, especially the one on the headband, but that fabric they’re covered in feels soft to touch and really does help to minimize sweat and reduce heat during the most intense moments in the game.

If you’re a fan of RGB lighting, the BlackShark V2 might disappoint as it has none of those frills. Personally, I kind of prefer it that way. The omission helps keep its cost down, and having RGB lighting on your headset on top of your gaming keyboard, your gaming mouse, and your gaming PC is a bit of an overkill for me.

In lieu of RGB lighting, Razer does spruce it up a bit with some green trimmings on the Razer logo and the audio cable connecting the two ear cups. This shade of green isn’t necessarily attractive to me, but I appreciate that it can be appealing to a lot of gamers. It also adds to the headset’s character, especially when coupled with its aviator look, which I actually really like.

As far as other thrills and frills, there’s really not much. The retractable mic is the new Hyperclear Cardioid Mic that Razer has developed and is launching for the first time on the BlackShark V2, but we’ll get to that in detail later. There is a volume control knob and a mic mute button, both of which are on the left ear cup. That’s pretty much it.

Software

Another first that’s launching alongside the Razer BlackShark V2 is THX Spatial Audio, which has its own section in the Razer Synapse software. This new technology essentially helps deliver more accurate sound positioning for a more realistic sound stage and 7.1 digital surround sound effect.

More importantly, it comes with the new THX Game Profiles, which are basically audio profiles custom-tuned to specific games. At the time of my testing, there are Game Profiles for 18 of the most popular games out there, including the four that I used to test the headset – Red Dead Redemption 2, Doom Eternal, Sekiro: Shadows Die Twice and Counter-Strike: Global Offensive.

Each Game Profile gives each game its own THX Environmental Mode for a more immersive audio experience, and Game Profiles for competitive games have an additional THX Competitive Mode that’s designed to give you a gaming advantage.

This new addition to the Razer Synapse software, which you’ll find in the Mixer section under Audio and can toggle on/off, is straightforward to use. I’m not sure how downloading the profiles will work post launch, as I was testing them in pre-production, but the controls themselves are pretty easy to figure out.

The software seems to list all the games you have installed on your computer, and the THX Environmental and THX Competitive Modes, if available, appear under each game’s Spatial Output dropdown menu. As far as fine-tuning the surround sound, it allows you to simply drag each of the points and adjust where sounds are coming from to your liking.

On top of these THX Spatial Audio settings and presets, the Razer Synapse software’s EQ has its own general use profiles as well like Music and Game, though each of its 10 bands are also customizable. It also has dedicated controls for Bass Boost, Sound Normalization, and Voice Clarity.
Performance

The sound quality of the Razer BlackShark V2 is surprisingly great. Admittedly, at default, it sounds a bit muffled, like there’s a blanket on top of the sound. High end can be a bit rolled off or muffled, which somewhat reduces clarity and detail. The environmental effects are also more mid-focused, not as articulate or as detailed. In RDR2, for example, I don’t hear the high-end pitter patter when it’s raining, just more of the lower frequency thuds, making the rain sound heavier.

But, I’m really being nitpicky here for the sake of this review. Unless you’re more discerning with audio, or you’re comparing Razer BlackShark V2 with other high-end headphones, this shouldn’t bother you. In fact, you probably won’t notice the difference.

The bass response is very good, giving your gaming experience a lot of rumble even without turning on the Bass Boost, while the mids are present, and don’t sound hollow. In addition, the soundstage is incredible. You’re really getting the full 7.1 experience – even without the THX Spatial Audio features. It’s accurate with great spatial separation, meaning you can hear things move around you and know where they’re coming from.

It’s pretty obvious that this headset has been designed specifically for gaming. You won’t get fatigued from too much high-end information. In fact, you won’t notice that slightly muffled sound when gaming, and the bass obviously offers a lot of rumble.

Sadly, it’s not as good for other media. You want all the details when watching movies and listening to music. Unfortunately, in movies, I notice the muffled sound a little more, making it a bit harder to get the full experience, especially when it comes to the dialogue. Music is the most affected media here, especially when listening to something with a lot of organic sound. Not that it doesn’t sound good. It sounds balanced enough, but again, it’s just a little bit rolled off or muffled.

The Razer BlackShark V2 is the first headset to feature the new Razer Triforce Titanium 50mm drivers. This patented design basically splits a single driver into three parts so that the highs, mids and lows each have their own unit. The idea of this design is to allow for the individual tuning of each frequency range. Also, by separating the highs, mids and lows into three distinct parts, each frequency range should get a purer representation in concept.

Unfortunately, the high end is still a little rolled off. That said, this new design really does seem to allow for better fine-tuning of each frequency range, making these headphones incredibly versatile when it comes to customizing the EQ, as well as boosting the base, adjusting sound normalization, which is a compressor that makes the loud parts quieter and the quieter parts louder, and toggling voice clarity, which is basically a high-end boost.

As for the THX Game Profiles, you’ll certainly notice a difference. While keeping the sound quality the same, both the THX Environmental Mode and THX Competitive Mode essentially offer distinctive EQ profiles for each game for their own purposes.

The THX Environmental Mode, though slightly different for each game, generally offers an expanded surround sound, making things sound just a little wider, as if you’re actually inside the world you’re playing in. That’s pretty great, and certainly adds to your gaming immersion. In addition, environmental effects like rain, fire, footsteps, and people talking in the background are louder while keeping their spatial positioning.

The THX Competitive Mode, on the other hand, essentially takes many of the environmental sounds and mutes them a little. That’s with the exception of the sounds of the players, friendly and otherwise. By doing so, it makes the sounds your enemies make feel a little more present. Spatial positioning is also great, though it doesn’t sound as wide as the THX Environmental Mode. But, the goal here is to give players that competitive edge in audio – by hearing enemies better and knowing where they’re coming from, you don’t have to look around and find them. You’ll know when they’re coming and where exactly they’re coming from.

It is worth noting, however, that the THX Competitive Mode seems only available for competitive games like CS:GO. The non-competitive games only have the THX Environmental Mode. Though again, I was using the pre-production version of the software.

Also launching with the Razer BlackShark V2 is the new Razer HyperClear Cardioid Mic with USB Sound Card. It sounds incredibly clear at default, and may be further customized to your liking via the Razer Synapse software. It does have a mic boost, if you want to be really loud, and boasts a couple of cool features as well.

One of those is Voice Gate, which is very effective. If you’re not familiar, Voice Gate is like a door that opens whenever you’re talking and closes when you’re not. It basically limits the mic from picking up background sounds from your end, especially when someone else is talking or no one is. There’s also Ambient Noise Reduction, which when turned on rejects most of the unnecessary background noise.

Finally, the mic has its own 10-band EQ in the software, with presets like Mic Boost, Broadcast and Conference. Have a shrill voice? This will help tone that down a little.
Purchasing Guide

The Razer BlackShark V2 + USB Sound Card, which is the model I reviewed, retails for $99.99, while the Razer BlackShark V2 X retails for $59.99. Both will be available worldwide on August 6 alongside the THX Game Profiles. Both models only come in black. Verdict

If you want an esports gaming headset that won’t give you wearer’s fatigue, but will definitely give you that gaming advantage, Razer BlackShark V2 is a headset worth looking into. This affordable pair of cans is lightweight and very comfortable to wear for long hours, delivers great sound quality and excellent soundstage perfect for gaming, and comes with the new THX Spatial Audio and Game Profiles (currently the only headset to support it). Sadly though, if you’re looking for a gaming headset that’s kind of a jack of all trades, the audio experience it offers when it comes to music and movies isn’t as detailed or articulate. But, that isn’t really what it’s designed for. The Razer BlackShark V2 is all about the esports life, and on that, it’s certainly succeeded.

MSI GE66 Raider Review: Good-Looking 300 Hz Powerhouse

If you’ve ever wondered, “Why aren’t gaming laptops flashier?” the MSI GE66 Raider is for you. With an RGB light bar and keyboard, aluminum build and trim design, it’s as beautiful as its price suggests — $1,899 to start, $2,999 as tested.

Packing an RTX 2080 Super Max-Q graphics card and 10th Gen Intel Core i9 CPU, The GE66 Raider proved it’s ready to make ample use of its mind-blowing 300 Hz display, too.

MSI GE66 Raider Specs

CPUIntel Core i9-10980HK
GraphicsNvidia GeForce RTX 2080 Super Max-Q (8GB GDDR6)
RAM32GB DDR4-3200
Storage1TB PCIe NVMe SSD
Display15.6 inches, 1920 x 1080 resolution @ 300 Hz, 3ms
NetworkingKiller Ethernet E3100 LAN, Killer Wi-Fi 6 AX1650 (2*2ax), Bluetooth 5.1
Ports2x USB 3.2 Gen 1 Type-A, USB 3.2 Gen 2 Type-A, USB 3.2 Gen 2×2 Type-C USB 3.2 Gen 2 Type-C (DisplayPort 1.4), HDMI 2.0, Mini DisplayPort 1.4, SD card reader, 3.5mm headphone/mic jack 
Camera1080p
Battery99WHr
Power Adapter280W
Operating SystemWindows 10 Home
Dimensions(WxDxH)14.1 x 10.5 x 0.9 inches (358.1 x 266.7 x 22.9mm)
Weight5.3 pounds (2.4kg)
Price (as configured)$2,999

Design of MSI GE66 Raider

How does a laptop manage to look more mature and more wild than your typical gaming clamshell? A cool and classy chassis underscored (quite literally) by a stunning RGB bar, that’s how. The GE66 Raider isn’t the only laptop to incorporate colorful LEDs on its deck. The Asus ROG Strix Scar 17 G732 has a light bar on three sides. However, I’d argue that the GE66 Raider does it best. The boldness of the light bar and its beveled glass encasement make for a crystalline vibe that goes galactic with the right color scheme. The default settings (a combination of fuchsia, blue and green) is enough of a show to cross the Aurora Borealis off my bucket list. (Okay, not quite). But with those same default settings on the keyboard, it’s one prismatic phenomenon that’s probably as showy as RGB can be without inducing nausea.

Speaking of the keyboard, this one is from SteelSeries and offers per-key programming via SteelSeries’ Engine 3 software, as is the RGB light bar. But only the default setting was cosmic enough for me to warrant this level of RGB spectacle.

The aluminum lid is a royal shade of gray, fitting for the dragon shield that tops it. The logo’s raised silver outlining is the sort of attention to detail that makes company logos more forgivable. Plus, a dragon emblem is way cooler than someone’s last name in a circle (for example). Sadly, silver only lives on the lid; the rest of the laptop is black, which, perhaps, helps the RGB pop.

On the left side of the GE66 Raider’s black deck is a USB 3.2 Gen 2×2 Type-C port (20 Gbps), a USB 3.2 Gen 2 Type-A (10 Gbps) port, plus a 3.5mm headphone/mic jack. The right side has a pair of  USB 3.2 Gen 1 Type-A ports (5 Gbps) and, surprisingly, an SD card reader. There are more ports on the laptop’s spine, namely HDMI 2.0, Mini DisplayPort 1.4, and RJ45 Ethernet port and a port for MSI’s proprietary charger. MSI really has all the bases covered here.

The underside of the laptop has what MSI calls “Dragon armor carving,” which is really a bunch of stretched out hexagons. Overall, this feels like a solid machine with only a small amount of flex in its thin, 15.6-inch screen. MSI says it increased the torque on the hinge by 14% over the last generation (the MSI GE65 Raider) and widened it 9%.

The sleek black deck is smooth with a very subtle hint of shimmer. Combined with the 5mm thin bezel around the display, 82% screen-to-body ratio and, again, the mesmerizing effect of the RGB keyboard and light bar, you’ve got a machine that seems premium where needed and fun where wanted.

The GE66 Raider stacks up averagely when it comes to 15-inch gaming clamshells. The Asus ROG Zephyrus Duo 15 GX550, for example, is 14.1 x 10.6 x 0.8 inches and 5.3 pounds, while our MSI review unit is 14.1 x 10.5 x 0.9 inches and the same weight. You can get sleeker though. The MSI GS66 Stealth, as its name subtly suggests, is slightly lighter at 4.6 pounds and trimmer at 14.2 x 9.7 x 0.7 inches.

MSI GE66 Raider Gaming Performance

With an RTX 2080 Super Max-Q graphics card, our review unit of the GE66 Raider easily hit 60 frames per second (fps) in most games. I enjoyed Battlefield V at ultra settings typically in the 80-90 frames per second (fps) range. During intense battles, it’d drop to roughly 73-76 fps, and when I crawled through some grass it climbed as high as 130 fps. After I added ray tracing into the mix, framerates stayed around the 70-80 fps range, hitting 99 fps during calm moments and the low 70s in heavy battle.

When it came to running the Shadow of the Tomb Raider benchmark (1920 x 1080, highest settings), the GE66 Raider averaged 75 fps. That’s 6 more fps than the Asus ROG Zephyrus Duo 15 GX550 and greater than the MSI GS66 Stealth’s 66 fps average. Both laptops use the same GPU as our review unit. Meanwhile, the Alienware m17 R3 with a Nvidia Geforce RTX 2080 Super came close to matching the GE66 Raider at 74 fps.

Our review unit outperformed its sibling MSI machine and the ROG Zephyrus Duo when it came to Grand the Grand Theft Auto V benchmark (1920 x 1080, very high) as well. However, the Alienware bested the MSI by 7 fps.

The Far Cry New Dawn (1920 x 1080, ultra) benchmark ran at 99 fps on our GE66 Raider. That’s 10 more fps than the Asus and Alienware and 14 more fps than the GS66 Stealth averaged.

The GE66 Raider also comes out on top when looking at Red Dead Redemption 2 (1920 x 1080, medium). Our configuration ran the benchmark at 58 fps, which is slightly faster than both the Zephyrus Duo and m17 R3 and 9 fps quicker than the other MSI machine here.

To stress test our review unit, we ran the Metro Exodus 1080p RTX benchmark on a loop 15 times to simulate 30 minutes of gaming. During this time, the game ran at an average framerate of 51.9 fps. The RTX 2080 Super Max-Q ran at an average clock speed of 1,360.4 MHz and temperature of 64 degrees Celsius (147.2 degrees Fahrenheit). The CPU, meanwhile, was running at 4.4 GHz average clock speed and 76.5 degrees Celsius Average (169.7 degrees Fahrenheit).

MSI GE66 Raider Productivity Performance

The configuration of the GE66 we tested has an Intel Core i9-10980HK with eight CPU cores and 16 threads, working with 32GB (2x 16GB) of DDR4-3200 RAM and a 1TB PCIe NVMe SSD. That’s a lot of power, and the laptop proved more than sufficient for running 22 Google Chrome tabs, including one playing Netflix, as well as Slack. I was able to track through an episode on Netflix with a 1-3 second delay. And there were no obvious delays when navigating or scrolling through my numerous browser tabs.

On Geekbench 5.1, an overall productivity performance benchmark, our configuration of the GE66 Raider proved more effective than the other machines here. Its score of 8,347 on all cores outshined the ROG Zephyrus Duo. The Asus scored 8,134 with the same specs as our review unit but with two 1TB SSDs in RAID0. The Alienware also has the same CPU and RAM as our GE66 Raider and a 1TB drive in RAID0. It fell behind our review unit by 720 points. The GE66 Stealth got 6,261, with a lesser Intel Core i7-10750H CPU, 32GB of DDR-2666 RAM and a 512GB SSD.

It took our review laptop 36 seconds to copy 25GB of files, which equates to 745.8 MBps. That’s much slower than the ROG Zephyrus Duo’s 1,413 MBps and the Alienware’s 1,220.4 MBps. The GE66 Stealth, however, was at a comparative crawl.

The GE66 Raider shined in Handbrake. It took the laptop 6 minutes and 59 seconds to transcode a video from 4K resolution to 1080p. That’s quicker than all the other laptops here, especially the GS66 Stealth, which needed 2:56 longer. 

MSI GE66 Raider Display

The screen on the GE66 Raider packs a wildly fast refresh rate of 300 Hz, coupled with a 3ms response time. This is part of a growing trend of gaming laptops sporting insanely high refresh rates, including the 300 Hz Razer Blade Pro 17 (2020) and Asus ROG Strix Scar 17 G732.

Even the best gaming monitors are still stuck at 240 Hz max (360 Hz desktop monitors are en route). But while the screen may update with new information 300 times a second, your graphics card may not be so fast, depending on the game you’re running. AAA titles are out of the question when it comes to hitting 300 fps. Instead, you’ll have to play an esports game, like Tom Clancy’s Rainbow Six Siege, FIFA, Rocket League or CS:GO to get past the 240 fps mark.

Overwatch is another contender for high framerates, so I dropped settings to the lowest on the GE66 Raider. I surpassed 240 fps quite frequently. Framerates were as high as 301 during a low-intensity training session, and during actual gameplay it usually was in the 250-260s, sometimes dropping as low as 194 fps and reaching as high as 281 fps.

In terms of image quality, the GE66 Raider’s screen packs a healthy amount of color for both gaming and movies. Overwatch looked as pleasant as ever on the laptop, with tanks featuring their gold tones instead of looking like a pale yellow. I could also see the nuanced shades of gray in Reinhart’s weapon, which can look more washed out and flat on other screens.

Mission: Impossible – Fallout also looked as colorful as I expected after watching it numerous times on a large TV. Green poplars in a garden stood out, as did the subtly olive tone of Ilsa’s jacket. The purple-pinkish haze that subtly covers a scene at an airport at dusk and is often lost on other displays was also visible.

The panel is IPS style, and side angle viewing lives up to expectations. When watching Mission: Impossible from a 90-degree angle there were reflections on the further half of the screen, but it was still watchable, especially for a movie this good. At a 45-degree angle, there were virtually no issues.

Our testing showed that this speedy panel averages a solid 300 nits max brightness. However, every other laptop here has a brighter screen, including the smaller second screen on the Zephyrus Duo. The other MSI and the ROG Zephyrus Duo offer a similar amount of coverage of the DCI-P3 color gamut as the GE66 Raider. However, the Alienware is incredibly colorful.

MSI GE66 Raider Keyboard and Touchpad

I love a trim gaming laptop, but in the GE66 Raider’s case, that comes at the price of a spacious keyboard. MSI said it enlarged the keycaps, especially the left Ctrl key, compared to the GE65 Raider. But there are also some (but not all) navigational keys squeezed into the right column, and the arrow keys that aren’t offset enough to be easily locatable. At the end of the day, you’re left with keys that are pretty close together and very flat, making it easy for the fingers to slide across to other keys accidentally. There are also some weird choices, like the abomination of the left FN and Ctrl keys crammed into one space.

When gaming, this resulted in mispressed keys and me having to look down more often than usual to reorient myself. The larger Ctrl key helped, but I still found it hard to find other keys when holding down Ctrl, like when I was trying to slide in Apex Legends. And when trying to input combos, I had to look down to figure out where I was in a sea of flat keys.

On the 10fastfigners.com typing I test I averaged 113.7 words per minute with a 96.6% accuracy rate. That’s pretty typical for me and only slightly below my 98% average accuracy, likely due to how snappy the keys are. But my fingers felt a little worn out afterward.

On the other hand, the keyboard’s quite functional. As mentioned, you get some navigational keys, like Home and Page Up. You can also use the function row to toggle the webcam off (handy for privacy), activate crosshairs for training, enter Game Mode, quickly turn the fans to max speed and toggle through the keyboard and light bar’s premade RGB effects simultaneously or control RGB brightness.

The GE66 Raider is also rocking a 4.1 x 2.5-inch touchpad, which I found to be a good size. It isn’t very slippery, instead offering a healthy amount of friction for control. I had no problem navigating Windows 10 with touchpad gestures.

MSI GE66 Raider Audio

The MSI GE66 Raider’s two 2W speakers live on either side of the deck, a more logical location than speakers that are under the laptop, which can result in muffled sound. They’re Dynaudio brand (if you forget, a logo on the deck will remind you), and MSI says they support up to a 192 KHz sampling rate and 24-bit Hi-res audio and go up to 122 dB.

In Overwatch, the overall sound was a little tinny. But I’ve heard worse, especially on other gaming laptops and thin ultraportables. The battlegrounds sounded like there were people banging on different types of metal trash cans as opposed to firing off different weapons. The audio didn’t sound as layered as usual, and even Reinherart’s voice was more metallic. When I switched to external speakers, I could hear more bass and a greater variance in weapon noises. The speakers’ volume, on the other hand, was ample, even with all my windows and balcony door open on a rainy day. 

Music also sounded different than usual. When I played “Like Glue,” Sean Paul sounded like he was singing far away down a tunnel and higher pitched. Moving to speakers resulted in a warmer voice with more bass. The instruments in The Strokes’ “What Ever Happened?” didn’t sound as detailed on the GE66 Raider either.

MSI GE66 Raider Upgradeability

Once you remove 11 Philips head screws and apply some elbow grease, you can pry off the GE66 Raider’s cover for upgrading. You can replace the RAM to reach up to 64GB (mine had two 16GB sticks), and my unit also had an empty spot for adding another M.2 SSD by removing an additional Philips head screw. You can also unscrew the Wi-Fi card.

MSI GE66 Raider Battery Life

Like the GS66 Stealth, MSI gave the GE66 Raider a 99WHr battery, the largest size it’s legally allowed to implement into a laptop, a company rep told me. But while the GE66 Raider may offer a lot of performance in a more portable package, you’ll still want to bring the charger if you plan on using it all day.

The GE66 Raider lasted 4 hours and 57 minutes on our battery test, which surfs the web, streams video and runs browser-based OpenGL tests while connected to Wi-Fi and with the screen at 150 nits brightness. This isn’t bad for a gaming laptop, but the GS66 Stealth lasted 1:39 longer. You can also get over an 1:15 more playing time with the ROG Zephyrus Duo if you’re willing to turn its second screen off. Still, the GE66 Raider’s battery life seems like a lifetime compared to how long the Alienware m17 R3 lasted.

MSI GE66 Raider Heat

As with many gaming laptops, the GE66 Raider can get pretty warm. It was common for me to notice the keyboard heating up, even during light productivity tasks and with fans set to max performance. Despite its thin stature, the GE66 Raider’s fans can get as loud as your typical gaming laptop when blazing at max speed.

In my experience, the GE66 Raider got too hot to use on my lap for long periods, and the keyboard was usually noticeably warm with the space above it being shockingly hot at times, even when just surfing the web.

After 15 minutes of playing YouTube videos, the Raider’s touchpad was 84.5 degrees Fahrenheit (29.2 degrees Celsius), and the spot between the G and H keys was 107.5 degrees Fahrenheit (41.9 degrees Celsius). But that hottest point was on the underside in the center, where the temperature hit 125 degrees Fahrenheit (51.7 degrees Celsius).

MSI rejigged the cooling system compared to the GE66 Raider’s predecessor that helped keep it 0.9 inches thick compared to the GE65 raider’s 1.1 inches. The company’s Cooler Boost 5 cooling system here uses two fans with 53 blades, besting the latter’s 37 blades. Each blade is 0.25mm thick, which is 38% thinner than before and supposed to help drive more airflow. The six copper heatpipes are also supposed to be wider than that of the GE65 Raider.

MSI GE66 Raider Webcam

The webcam on the GE66 Raider is, thankfully, 1080p (at 30 frames per second), rather than the 720p that’s not uncommon in today’s laptop webcams. With video calls becoming a bigger part of the work day, the sharper resolution is more important than ever. And given Asus ditched the webcam altogether on many of its recent gaming laptops, we’re happy to see MSI step things up this way.

The webcam here proved decent. It was slightly, but not very noticeably, sharper than a 720p laptop webcam in a side-by-side comparison, with less fuzz and graininess. But my skin was still slightly grainy, and the color was slightly too cool.

MSI GE66 Raider Software and Warranty

Our MSI GE66 Raider came with several MSI-branded apps.

MSI Dragon Center primarily provides an overview of your PC’s components, namely CPU, GPU, disk, memory and SSD. You can get info like fan speeds, temperatures and amount of space remaining. This is also where you can toggle between Extreme Performance, Silent, Battery and more to control fan intensity. And if you have components or peripherals that support MSI’s Mystic Light RGB, you can sync effects. 

MSI True Color offers different picture modes, like gamer, anti-blue and sRGB, with some offering sliders for further adjustments. It also includes a small number of tools, the most helpful of which is the crosshair. And MSI App Player would be handy if I had an Android phone and wanted to sync games between the two PCs.

You also get Killer Control Center, which is useful for focusing bandwidth on a particular app, such as when downloading a new game or streaming. MSI also threw in Nahimic Sound Sharing, which lets you tweak audio on connected speakers or headphones and play with the built-in mic.

Of course, you also get your typical Windows 10 bloatware, like Xbox Game Bar.

MSI backs the GE66 Raider with a 1-year warranty.

MSI GE66 Raider Configurations and Availability

At $2,999, our configuration of the GE66 Raider is as powerful as it gets. It comes with an Intel Core i9-10980HK CPU, Nvidia GeForce RTX 2080 Super Max-Q (8GB GDDR6) graphics, 32GB of DDR4-3200 RAM and a 1TB NVMe PCIe SSD. You can find it by the SKU number GE66 Raider 10SGS-057.

The cheapest version, the GE66 Raider 10SF-285, is $1,899. For that price, you get an i7-10875H, RTX 2070 graphics, 16GB of RAM and 512GB of SSD storage. The display also drops to a ‘mere’ 240 Hz, which is, of course, still plenty for most serious gamers. Alternatively, you can pay the same price for a 144 Hz screen; the benefits there are a bump to a 1TB SSD, but you also get a  i7-10750H CPU instead, which is a hexa-core processor compared to the i7-10875H’s octa-core chip.

There are three available SKUs in between. The GE66 Raider 10SGS-288 for $2,799 (i7-10875H / RTX 2080 Super Max-Q / 32GB / 1TB) is the only configuration besides our review unit that also offers a 300 Hz screen.

Bottom Line

The MSI GE66 Raider is a powerhouse of a gaming laptop with looks to match. With its high-end but slim shell, powerful GPU, 10th Gen Intel Core i9 CPU and a lot of storage, you won’t be left wanting or bogged down with bulk.

Our pricey configuration usually topped our comparison group more when it came togaming performance. And its 300 Hz screen won’t go to waste if you’re an esports player. We surpassed 240 fps regularly on Overwatch and even climbed past 300 fps during more idle gameplay time. Productivity performance was also comparable to rivals, and I had no issues multi-tasking.

However, if you want a very colorful or bright screen, the Alienware m17 is a much better choice. The Asus ROG Zephyrus Duo 15 is also better in that regard, plus may be as lavish as the GE66 Raider, thanks to its second screen.

But if you can afford to make this investment in performance and prettiness, the GE66 Raider is pure premium gaming luxury.

HP Envy 15 First Impressions

As you may recall, I recently reviewed the HP Envy x360 13 and loved it: This AMD Ryzen 4000-series convertible is one of the best portable PCs I’ve ever used, a near-perfect combination of performance, longevity, versatility, affordability, and quality. Part of the appeal of that machine is related to wear it sits in HP’s product lineup: The firm doesn’t put it this way, but the Envy family sits at what I call the sweet spot, bringing the best of HP’s premium—and more expensive—EliteBook and Spectre products to more affordable price points and thus to more people.

On that note, the HP Envy 15 isn’t a larger version of the Envy x360 13, not exactly. It’s not a convertible PC, for starters, it’s a more traditional laptop. But as an Envy, the Envy 15 exhibits many of the same qualities as the smaller Envy x360 13—specifically, the performance, longevity, affordability, and quality I noted above—but turns things up a notch. Where the Envy x360 is ideal for productivity scenarios, the Envy 15 appears to be an ideal solution for creative scenarios. This PC is for power users.

It starts on the inside with gaming-class components like 10th-generation Intel Core H-series processors—6-core Core i7 and 8-core Core i9 parts, depending on model—and up to NVIDIA GeForce RTX 2060 graphics, 32 GB of RAM, and 2 TB of PCIe-based SSD storage.

It extends from there to the display, a massive 15.6-inch panel that is available in Full HD (1920 x 1080) and 4K/UHD OLED (3840 x 2160) options, each of which is touch- and pen-capable, and the latter of which provides HP color calibration, 100 percent DCI-P3 wide color gamut support for accurate and consistent color reproduction, and VESA Display HDR True Black capabilities.

And then it inhabits all that I love about Envy, from the minimalist design—in this case, in a standard gray aluminum form factor—with subtle touches throughout. As a non-gaming PC (that can be used for gaming), the Envy 15 lacks a numeric keypad, which I very much prefer, providing instead the same basic layout—and typing experience—found on the Envy x360 13, but floating in a larger keyboard deck with large stereo speakers on either design.

This minimalist design can’t help but evoke the Apple MacBook Pro 16, which looks similar but costs many, many hundreds of dollars more and lacks many of the niceties one gets with the HP.

For example, instead of four Thunderbolt 3/USB-C ports as on the Apple, the Envy provides 2 full-sized USB-A ports, 2 Thunderbolt 3/USB-C ports, HDMI for video out, and a microSD card reader. Overall, you can connect up to three external displays to this PC if required.

And there are more subtle advantages like the physical webcam shutter, microphone mute switch, Windows Hello facial recognition (in addition to the fingerprint reader), and its superior display, processor options, and graphics.

Connectivity is modern, with Wi-Fi 6 and Bluetooth 5, plus HP’s Network Booster for customizing network prioritization.

The HP Envy 15 is, of course, large and heavy compared to most traditional laptops, but it’s not bad for a 15-inch unit: It weighs about 4.6 pounds and is about .73 inches thick as its tallest point. There’s some serious thermal management going on inside the enclosure, and while I have heard a bit of fan noise during installs and the like, it’s been mostly quiet so far.

Battery life is allegedly amazing: HP rates the Full HD version at an incredible 18+ hours of battery life; I’ll test that, of course, but I’m reviewing the 4K/UHD version and the longevity will take a hit; HP says I can expect to see somewhere between 8 and 11 hours in video playback. But HP also outfits the Envy 15 with fast-charging capabilities, so you can get a 50 percent charge in 45 minutes. The power supply is enormous and has a barrel plug connector.

HP also outfits the Envy 15 with a wide range of software—too wide, one might argue—and some looks interesting. In addition to the Network Booster I mention above, there’s a Performance Control app for optimizing performance between default, performance, cool, and quiet modes; a Display Control for different color spaces, and even an AirDrop-like solution called HP QuickDrop that works with both Android and iOS.

So let’s get to the price. How much would you expect to pay for a potential MacBook Pro 16 killer?

Well, the HP Envy 15 starts at just $1150. For that cost, you’ll get a Core i7-1075H processor, NVIDIA GeForce GTX 1650 Ti graphics, 16 GB of RAM, 256 GB SSD, and a Full HD display. Not too shabby, right? But you can upgrade to a model with NVIDIA GeForce GTX 1660 Ti Max-Q graphics and a 512 GB SSD for a total cost of $1400. Or to my review unit—NVIDIA GeForce RTX 2060 Max-Q graphics, 4K/UHD OLED, and 512GB SSD + 32GB Intel Optane—for $1499. A top-shelf model with NVIDIA GeForce RTX 2060 Max-Q graphics, 4K/UHD OLED, 32 GB of RAM, and 1 TB of SSD will set you back $1899. As a reminder, the MacBook Pro 16 starts at $2399.

Folks, this one looks impressive. So impressive that I’m considering doing a longer-term review in the form of a “Living with” series of articles. More soon.

ASUS Introduces The World’s First HDMI 2.1 Certified Gaming Monitor

ASUS’s Gaming Brand, Republic of Gamers, announces that it will be releasing the world’s first HDMI 2.1 certified gaming monitor offering a screen size of up to 43 inches. This HDMI 2.1 certification has passed all compatibility and validation tests, which was conducted by Allion Labs, Inc.

ASUS Introduces the World’s First HDMI 2.1 Certified which features a 4K resolution and a refresh rate of up to 120 Hz

The new ROG monitor will be compatible with next-generation consoles with the HDMI 2.1 certification. The HDMI 2.1 port gives a full bandwidth of up to 48 Gbps to support 4K UHD, or 3,840 x 2,160 resolution. The display also offers a refresh rate of up to 120 Hz.

Allion Labs, Inc is an international company which has specialized in product testing. The Vice President of Logo & HW Validation Consulting at Allion Labs, Brian Shih, said, “ROG is the first partner to provide an HDMI 2.1 gaming monitor for certification. As a leading test lab in the world, it’s our mission to assure products or services before they are launched. We are thrilled to be part of the success of ROG and this groundbreaking gaming monitor.”

Allion Labs has subjected this monitor to a large number of different tests, including FRL Electrical, FRL Pixel Decoding, and FRL Protocol tests. All of these tests are labeled as Fixed Rate Link (FRL) tests, and ensure that this monitor will be completely compatible with upcoming HDMI 2.1 devices.

This monitor comes just before the release of the Xbox Series X and the Play Station 5, which are set to release later this year. ROG is planned to release three different models, having a variety of different screen sizes ranging from 27, 32, and even a 43-inch model. The variety of sizes means that if a gaming setup needs a smaller monitor but wants a high-end resolution and refresh rate, then they can purchase one of the smaller size monitors.

Sadly, at the time of writing, ASUS has yet to release any information regarding what these monitors will cost or when they will be available for purchase. ASUS has also not released any more technical specifications, like the type of panel and the video input ports.

Samsung’s Galaxy Z Fold 2 is official, comes with a ton of improvements

Samsung Unpacked 2020 is happening today, but the star of the show, the Galaxy Z Fold 2, only got a light teasing. We got official press pictures, one or two specs, and a promise of more info on September 1. The good news is that there was also a full spec sheet leak today from XDA’s Max Weinbach, and it fills in most of the blanks.

Samsung’s second-generation foldable is officially the “Galaxy Z Fold 2,” a slight name change from “Samsung Galaxy Fold” that puts it in the same class as Samsung’s other foldable, the Galaxy Z Flip. The smartphone/tablet hybrid is very much in the mold of the Galaxy Fold 1 from last year, but it has a ton of iterative yearly upgrades and refinements.

The most noticeable upgrade is that the outer screen now fills the front of the phone. XDA’s specs list the display as a 6.2-inch, 2260×816 OLED display with a crazy 25:9 aspect ratio. This is dramatically bigger than the 4.6-inch display that shipped on the Fold 1, which looked really out of place, with somewhere around a 50-percent body-to-display ratio. The new display is still very tall and skinny, but the “phone” part of the Fold 2 now looks more like a smartphone.

At a glance, the Fold 2 might look like the same shape as last year, but it’s actually a tiny bit wider. You can get a rough idea of this from the official pictures, but XDA’s specs put the Fold 2 at 159.2×128.2×6.9mm when open, while the original fold was 160.9×117.9×7.6mm. That means, when folded, the front is a bit wider, too: 68mm wide compared to 62.8mm wide on the original Fold. The primary problem with the Fold1’s outer display was that it was very skinny, limiting things like the size of the keyboard and its ability to display a normal home screen with four columns of icons. The wider body and thinner bezels should help the Fold 2 approach a normal-sized smartphone screen.

XDA lists the big, inner Fold display at 7.6-inches with a 2208×1768 resolution. It’s now a 5:4 resolution instead of the iPad-like 4:3. Samsung confirmed the inner display is 120Hz, which is a big upgrade, but it did not mention the refresh rate of the outer display. XDA’s leaked spec sheet lists the outer display at 60Hz, which would be an odd proposition for users. It seems most people who try a higher refresh rate screen say something like “I could never go back to 60Hz,” but if these specs are right, the Fold 2 will ask you to do just that every time you close the phone.

Like the Galaxy Z Flip, the Fold 2 now officially has Samsung’s “ultra-thin glass” display cover, a glass-and-plastic sandwich that should be a huge improvement over the foggy, squishy, plastic cover that was on the original Fold. Like we learned on the Z Flip, ultra-thin glass is not as nice as Gorilla Glass, since the top-most layer is plastic reminiscent of a stick-on screen protector. While you still won’t be touching glass, Samsung’s display cover gives you a firmer surface to swipe around on and better optics compared to an all-plastic cover. Be warned that the flexible glass isn’t that firm, though—the Z Flip still had a big crease over the hinge, which would sink down when it was open, creating a trough across the middle of the display.

The other interior improvement is the hole-punch camera, a big upgrade over the gigantic notch that was fitted to the original Galaxy Fold. The Fold 1 notch took up most of the status bar area on the right side of the display, making it tough to swipe down the notification panel with your right hand. The hole punch will leave a lot more of the display in a usable state.

Another Fold 2 feature borrowed from the Z Flip is what Samsung called a “completely reengineered” hinge, which can stop at the halfway point, in an “L” shape. This hinge wasn’t a great idea in a flip phone form factor since it stopped you from flipping the phone open, but nobody wants to flip open a tablet-style device, so this seems more appropriate here.

A Qualcomm press release lists the Fold 2 with a Snapdragon 865 Plus and says “appearing commercially for the first time, the Galaxy Z Fold 2 features the latest Qualcomm FastConnect 6900 mobile connectivity system.” This means the Fold 2 will be the world’s first Wi-Fi 6E device, supporting the new 6GHz Wi-Fi band for better performance in crowded environments (provided you also have a Wi-Fi 6E access point).

XDA lists the phone as having 12GB of RAM, 256GB of storage, wireless charging, and a 4500mAh battery. The cameras don’t seem like they’re up to the level of the Note 20 Ultra, with 12MP sensors for the main camera and ultra-wide angle and telephoto lenses. The selfie cameras on the cover and inner displays both live in a hole punch cutout, and they are 10MP sensors.

Samsung says it will reveal more details on September 1, which is also when pre-orders start.

54Y8843 800W Ac Adapter, Replacement Genuine Lenovo Thinkstation C30 Power Adapter Charger

The LENOVO 54Y8843 Servers charger from tech-battery.com delivers power when you need it and where you need it. It has been specially designed to meet the power needs of your LENOVO Servers and will help you power up your Servers in the office, business trips or vacations. Our 54Y8843 Servers Adapter is high quality and 1 year warranty. You can get this discount LENOVO 54Y8843 Servers Power Supply with Low price. We also can ship 54Y8843 Adapter worldwide.

54Y8843
  • DC Output: 100-127/200-240V~,12/6A,50/60Hz
  • AC Input: 800W
  • Power: 800W

* Please ensure the product(s) that you are going to buy fits the brand, model and part number of your device.
Placing order is easy: Add To Cart—> Fill Shipping information—-> Check out—->Finished.
An email include order detais will be sent out after you check out.
Tracking order is easy: An email will be sent out after your order shipping. You can get the Tracking Number, the Tracking Url with order id on your email.

REPLACES THE FOLLOWING PRODUCTS:

FSP800-90WSE SP50A33621 36200338 54Y8843 54Y8904

FITS THE FOLLOWING DEVICES:

Lenovo Thinkstation C30
LI P/N : SP50A33621 CL P/N : 36200338 FRU NO: 54Y8904 REV : 01

54Y8843 ac adapter not working?

When the 54Y8843 AC adapter (charger) fails to work, it will neither charge the Servers battery nor provide power to operate the Servers without battery power. Power issues on a Servers are compounded because a Servers has two power sources: AC adapter (charger) & battery. When 54Y8843 power is not available, power is provided by the Servers battery.

If you’re having issues with your 54Y8843 adapter not charging your Servers, please try to follow these steps to solve the problem.

Inspect the 54Y8843 AC adapter, cables and adapter (DC) port on the Servers for damages

Check if the indicator light on the 54Y8843 adapter is lit.

Unplug the AC adapter from the wall outlet.

Unplug the 54Y8843 AC adapter from the Servers.

Check the AC adapter and cables (including the power cable) for signs of physical damage or overheating.

Check if the pin inside the plug or 54Y8843 adapter port is bent, broken or damaged.

Verify the wall outlet is working:

Unplug the 54Y8843 AC adapter from the wall outlet.

Connect another device to the wall outlet to verify if the wall outlet is working correctly.

Try a known-good wall outlet.

Plug the 54Y8843 AC adapter directly into the wall outlet.

Drain remaining power:

Unplug the 54Y8843 AC adapter from the wall outlet.

Disconnect any external peripherals connected to the Servers.

Press and hold the Power button for 30 seconds to drain a residual power from the Servers.

Plug the 54Y8843 AC adapter into the Servers.

Turn on the Servers. If your Servers still can’t strat, you need a new 54Y8843 ac adapter.

11 Tips On Choosing The Correct 54Y8843 Servers Charger

It is not difficult to find the correct 54Y8843 Servers charger if you are ready to do a little research. Many people end up purchasing wrong Servers chargers from the internet simply because they do not set aside enough time to look for the correct information. To help you in this regard, the following is a compilation of some important tips on finding the right 54Y8843 charger for your Servers:

1. Before you make up your mind to buy a new charger, make sure you check the 54Y8843 Servers power supply and detachable wires for any faults. Just make sure that your charger is indeed faulty before you decide to place an order either online or offline.

2. Serverss in a series may or may not have the same 54Y8843 charger. Different models manufactured by a company have different specifications. Always keep the compatibility aspect in mind while making such purchases.

3. You must scout for the correct information. Finding Servers chargers can be an extremely convenient process if you have the right information. This information can be found on your Servers or the old Servers charger very easily. Note down the manufacturer’s information labelled on your old 54Y8843 charger. Use this information when you perform an online search.

4. If you are going to purchase from a local computer or electronics store, look carefully at the list of all computer models compatible with a 54Y8843 charger under consideration. Servers chargers generally come with a list of various Servers makes.

5. Turn your Servers face down and note the product information stamped by the manufacturer. These specs are provided on different parts of the Servers. Look for the product specification stamp that reads something along the lines of ‘AC Adapter.’ That is where you can easily find the correct model number of all chargers.

6. Make sure you have the right pin connectors while purchasing a 54Y8843 charger for your Servers. These pins should be compatible with your existing wall sockets. Charging your Servers can be a bother with a new charger if its pins do not fit into your room’s wall sockets.

7. You can find a Servers charger with additional features. These days, it is possible to find chargers that trip the Servers power supply as soon as there is a voltage fluctuation. These chargers are great, especially if you live in an area where power fluctuations are frequent.

8. It is possible to find a universal charger nowadays since many manufactures are selling one-for-all chargers. These Servers chargers are fine as long as you find one that is compatible with your Servers.

9. Always check the voltage, input, and output before buying any charger. These details are labelled on the product packaging. Make sure this information is in keeping with the specs of your Servers.

10. Do not be tempted by unbelievably low prices on some websites as you may end up placing an order for a duplicate product. Always buy Servers chargers from a reputed or professional site.

11. In principle, the more authentication the more reliable the adapter is. Don’t buy a compatible 54Y8843 adapter with few certifications, it will hurt your machine.

How to do when ac adapter buzzing noise?

Buzzing in an AC adapter can mean a number of things, but often it is related to a damaged adapter, poor grounding or phasing issues with your power. Figuring out exactly why your AC adapter is buzzing will probably require some troubleshooting, but in the end you can probably isolate the problem and get rid of the frustrating noise.

Check for any obvious damage to the adapter. If any of the outer rubber coating has been damaged so that the conductor inside is exposed, this could allow interference to enter the current and cause a buzzing sound. Untie any knots if the cord has become knotted. Make sure that the connection where the cord meets the actual box adapter is still intact; this sometimes can become damaged and make a poor connection.

Repair any damage with electrical tape. Cover all exposed areas.

Plug the AC adapter into the same outlet as the other equipment you are using. Some apartments and houses have multiple phases of power that can create audio interference if mixed together, so running everything off of the same phase might get rid of the buzz.

Run your equipment through a surge protecting power strip or, if necessary, a power conditioner. Audio and video equipment is especially susceptible to interference caused by ground looping. A power conditioner will smooth out the current and protect your equipment from any peaks or spikes in current.

Why laptop adapter light blinks?

Question description:

A few days ago studying in the UH library, I noticed my laptop all of a sudden wasn’t receiving power and the light my AC adapter was blinking. After unplugging it from the laptop, that is, from the power jack, the AC adapter’s light turned solid green again. Then, as you might guess, after plugging it back into the laptop’s power jack, the light on the adapter would again start blinking and no power would circulate.

After brief research, I learned that I could take the battery out and press the power button to relieve all currents and that after that everything would work fine. Well, I did get it to work, however not my this method. After trying it several times and failing, I figured I’d just use the laptop without the battery, since it powered the laptop without the battery in it. Then the idea of just placing the battery back in the laptop while I was receiving power came up. So as the laptop is working I placed the battery in and SUCCESS the AC adapter no longer was blinking and it was successfully transferring power to the laptop and battery.

Now, however, several days later, in a similar library, I noticed I wasn’t receiving power again. When I unplugged the adapter from the laptop, the light on the adapter continued to blink. This was not the case previously. Previously, the light on the adapter would only blink when plugged into the laptop and would turn solid green when I disconnected it from the laptop. Now however, without the laptop ever coming into the picture, the AC adapter, by itself, not plugged into anything other than the wall, constantly blinks. The laptop receives no power, and I’m stuck.

Also, used my sisters AC adapter, she has a similar laptop, and everything worked fine. Meanwhile, my AC adapter, while plugged into the same power jack in the wall, just blinks.. and blinks…

someone help.

Answer:

The AC adapter’s light turned solid green means ac adapter have a solid out put. When the light blinking, it means that the adapter is trying to output again and again, and it keeps flashing to indicate that the output was failed. You need check laptop dc jack or a MOSFET on laptop motherboard. Usually one laptop model develops this kind of fault and then many of the same model start to fail.

PS-5181-09VS 180W Ac Adapter, Replacement Genuine Lenovo 54Y8885 54Y8894 54Y883581-09VS Power Adapter Charger

The LENOVO PS-5181-09VS Servers charger from tech-battery.com delivers power when you need it and where you need it. It has been specially designed to meet the power needs of your LENOVO Servers and will help you power up your Servers in the office, business trips or vacations. Our PS-5181-09VS Servers Adapter is high quality and 1 year warranty. You can get this discount LENOVO PS-5181-09VS Servers Power Supply with Low price. We also can ship PS-5181-09VS Adapter worldwide.

PS-5181-09VS
  • DC Output: 100-127V~/6A;200-240v/~/3A;50-60Hz
  • AC Input: 180W;+5v=/10A Max
  • Power: 180W

* Please ensure the product(s) that you are going to buy fits the brand, model and part number of your device.
Placing order is easy: Add To Cart—> Fill Shipping information—-> Check out—->Finished.
An email include order detais will be sent out after you check out.
Tracking order is easy: An email will be sent out after your order shipping. You can get the Tracking Number, the Tracking Url with order id on your email.

REPLACES THE FOLLOWING PRODUCTS:

54Y8885 54Y8894 54Y8835 PS-5181-09VS

FITS THE FOLLOWING DEVICES:

LC: 36200489 EC Level: 286298
LI: SP50A33578 FRU P/N: 54Y88
Lenovo 54Y8885 54Y8894 54Y8835 PS-5181-09VS

PS-5181-09VS ac adapter not working?

When the PS-5181-09VS AC adapter (charger) fails to work, it will neither charge the Servers battery nor provide power to operate the Servers without battery power. Power issues on a Servers are compounded because a Servers has two power sources: AC adapter (charger) & battery. When PS-5181-09VS power is not available, power is provided by the Servers battery.

If you’re having issues with your PS-5181-09VS adapter not charging your Servers, please try to follow these steps to solve the problem.

Inspect the PS-5181-09VS AC adapter, cables and adapter (DC) port on the Servers for damages

Check if the indicator light on the PS-5181-09VS adapter is lit.

Unplug the AC adapter from the wall outlet.

Unplug the PS-5181-09VS AC adapter from the Servers.

Check the AC adapter and cables (including the power cable) for signs of physical damage or overheating.

Check if the pin inside the plug or PS-5181-09VS adapter port is bent, broken or damaged.

Verify the wall outlet is working:

Unplug the PS-5181-09VS AC adapter from the wall outlet.

Connect another device to the wall outlet to verify if the wall outlet is working correctly.

Try a known-good wall outlet.

Plug the PS-5181-09VS AC adapter directly into the wall outlet.

Drain remaining power:

Unplug the PS-5181-09VS AC adapter from the wall outlet.

Disconnect any external peripherals connected to the Servers.

Press and hold the Power button for 30 seconds to drain a residual power from the Servers.

Plug the PS-5181-09VS AC adapter into the Servers.

Turn on the Servers. If your Servers still can’t strat, you need a new PS-5181-09VS ac adapter.

11 Tips On Choosing The Correct PS-5181-09VS Servers Charger

It is not difficult to find the correct PS-5181-09VS Servers charger if you are ready to do a little research. Many people end up purchasing wrong Servers chargers from the internet simply because they do not set aside enough time to look for the correct information. To help you in this regard, the following is a compilation of some important tips on finding the right PS-5181-09VS charger for your Servers:

1. Before you make up your mind to buy a new charger, make sure you check the PS-5181-09VS Servers power supply and detachable wires for any faults. Just make sure that your charger is indeed faulty before you decide to place an order either online or offline.

2. Serverss in a series may or may not have the same PS-5181-09VS charger. Different models manufactured by a company have different specifications. Always keep the compatibility aspect in mind while making such purchases.

3. You must scout for the correct information. Finding Servers chargers can be an extremely convenient process if you have the right information. This information can be found on your Servers or the old Servers charger very easily. Note down the manufacturer’s information labelled on your old PS-5181-09VS charger. Use this information when you perform an online search.

4. If you are going to purchase from a local computer or electronics store, look carefully at the list of all computer models compatible with a PS-5181-09VS charger under consideration. Servers chargers generally come with a list of various Servers makes.

5. Turn your Servers face down and note the product information stamped by the manufacturer. These specs are provided on different parts of the Servers. Look for the product specification stamp that reads something along the lines of ‘AC Adapter.’ That is where you can easily find the correct model number of all chargers.

6. Make sure you have the right pin connectors while purchasing a PS-5181-09VS charger for your Servers. These pins should be compatible with your existing wall sockets. Charging your Servers can be a bother with a new charger if its pins do not fit into your room’s wall sockets.

7. You can find a Servers charger with additional features. These days, it is possible to find chargers that trip the Servers power supply as soon as there is a voltage fluctuation. These chargers are great, especially if you live in an area where power fluctuations are frequent.

8. It is possible to find a universal charger nowadays since many manufactures are selling one-for-all chargers. These Servers chargers are fine as long as you find one that is compatible with your Servers.

9. Always check the voltage, input, and output before buying any charger. These details are labelled on the product packaging. Make sure this information is in keeping with the specs of your Servers.

10. Do not be tempted by unbelievably low prices on some websites as you may end up placing an order for a duplicate product. Always buy Servers chargers from a reputed or professional site.

11. In principle, the more authentication the more reliable the adapter is. Don’t buy a compatible PS-5181-09VS adapter with few certifications, it will hurt your machine.

How to do when ac adapter buzzing noise?

Buzzing in an AC adapter can mean a number of things, but often it is related to a damaged adapter, poor grounding or phasing issues with your power. Figuring out exactly why your AC adapter is buzzing will probably require some troubleshooting, but in the end you can probably isolate the problem and get rid of the frustrating noise.

Check for any obvious damage to the adapter. If any of the outer rubber coating has been damaged so that the conductor inside is exposed, this could allow interference to enter the current and cause a buzzing sound. Untie any knots if the cord has become knotted. Make sure that the connection where the cord meets the actual box adapter is still intact; this sometimes can become damaged and make a poor connection.

Repair any damage with electrical tape. Cover all exposed areas.

Plug the AC adapter into the same outlet as the other equipment you are using. Some apartments and houses have multiple phases of power that can create audio interference if mixed together, so running everything off of the same phase might get rid of the buzz.

Run your equipment through a surge protecting power strip or, if necessary, a power conditioner. Audio and video equipment is especially susceptible to interference caused by ground looping. A power conditioner will smooth out the current and protect your equipment from any peaks or spikes in current.

Why laptop adapter light blinks?

Question description:

A few days ago studying in the UH library, I noticed my laptop all of a sudden wasn’t receiving power and the light my AC adapter was blinking. After unplugging it from the laptop, that is, from the power jack, the AC adapter’s light turned solid green again. Then, as you might guess, after plugging it back into the laptop’s power jack, the light on the adapter would again start blinking and no power would circulate.

After brief research, I learned that I could take the battery out and press the power button to relieve all currents and that after that everything would work fine. Well, I did get it to work, however not my this method. After trying it several times and failing, I figured I’d just use the laptop without the battery, since it powered the laptop without the battery in it. Then the idea of just placing the battery back in the laptop while I was receiving power came up. So as the laptop is working I placed the battery in and SUCCESS the AC adapter no longer was blinking and it was successfully transferring power to the laptop and battery.

Now, however, several days later, in a similar library, I noticed I wasn’t receiving power again. When I unplugged the adapter from the laptop, the light on the adapter continued to blink. This was not the case previously. Previously, the light on the adapter would only blink when plugged into the laptop and would turn solid green when I disconnected it from the laptop. Now however, without the laptop ever coming into the picture, the AC adapter, by itself, not plugged into anything other than the wall, constantly blinks. The laptop receives no power, and I’m stuck.

Also, used my sisters AC adapter, she has a similar laptop, and everything worked fine. Meanwhile, my AC adapter, while plugged into the same power jack in the wall, just blinks.. and blinks…

someone help.

Answer:

The AC adapter’s light turned solid green means ac adapter have a solid out put. When the light blinking, it means that the adapter is trying to output again and again, and it keeps flashing to indicate that the output was failed. You need check laptop dc jack or a MOSFET on laptop motherboard. Usually one laptop model develops this kind of fault and then many of the same model start to fail.

D09RM 90W Ac Adapter, Replacement Genuine Dell Inspiron 1120 11z 1110 1546 1720 Power Adapter Charger

The DELL D09RM laptop(adapter) charger from tech-battery.com delivers power when you need it and where you need it. It has been specially designed to meet the power needs of your DELL laptop(adapter) and will help you power up your laptop(adapter) in the office, business trips or vacations. Our D09RM laptop(adapter) Adapter is high quality and 1 year warranty. You can get this discount DELL D09RM laptop(adapter) Power Supply with Low price. We also can ship D09RM Adapter worldwide.

D09RM
  • DC Output:
  • AC Input: 90W
  • Power: 90W

* Please ensure the product(s) that you are going to buy fits the brand, model and part number of your device.
Placing order is easy: Add To Cart—> Fill Shipping information—-> Check out—->Finished.
An email include order detais will be sent out after you check out.
Tracking order is easy: An email will be sent out after your order shipping. You can get the Tracking Number, the Tracking Url with order id on your email.

REPLACES THE FOLLOWING PRODUCTS:

331-3866331-7221331-8832331-2403331-8146331-1857331-189228F6C6P7X3H536TD09RM028F6C06P7X30H536T0D09RMADP-90DN

FITS THE FOLLOWING DEVICES:

For charging or use your notebook in a car or on an airplane
For use in a standard cigarette lighter or EMPOWER? connector
For notebooks with a 7.4mm *5.0mm power connector
length: approx. 2m
Power: 90W

Compatible Models:
For
Alienware M11x,M11x R3
Dell Inspiron
11 (3137),1120,11z (1110)
13 (1318),13R (N3010),13z (5323)
14 (1464,3421,7437),1420,14R (5420,5421,N4010,N4110),
14z (1470,5423,N411z)
15 (1525,1526,1545,1564,3520,3521,7537)
15R (5520,5521,7520,N5010,N5110),15z (1570)
17 (1750,1764,3721,7737),
17R (5720,5721,7720,N7010,N7110) 1520,1521,1546,1720,1721,2650,
4100,6000,630m,6400,710m,
8500,8600,9300,9400
E1505,E1705
M4110,M5010,M5030,M5110
N4020,N4030,N5030,N5040,N5050

Latitude
13,2100,2110,2120,6430u
D410,D420,D430,D500,D505,D510,
D520,D530,D531,D600,D610,D620,
D630,D631,D800,D810,D820,D830
E4200,E4300,E4310,E5400,E5410,
E5420,E5430,E5440,E5500,E5510,E5520,
E5530,E5540,E6220 E6230,E6320,E6330,E6400,
E6400 ATG,E6400 XFR,E6410,E6410 ATG,
E6420,E6420 XFR,E6430,E6440
E6500,E6510,E6520,E6530,E6540
L13,XT,XT2,XT2 XFR,XT3

Precision
M20,M50,M65,M90,M2300,
M2400,M4300,M4400,M4500,M6300
Studio
1457,1458,14z (1440),15 (1535,1537),
1536,1555,1557,1558,1735,
1737,1745,1747,1749 XPS 13 (M1340),16 (1640,1645,1647)

Vostro
1000,1014,1015,1088,1220,1310,
1320,1400,1440,1500,1510,1520,1540
1700,1710,1720,3300,3350,
3360,3400,3450,3460,3500,
3550,3560,3700,3750
A840,A860,V130
XPS
11,12,12 MLK,13 (9333),
XPS 14 (L401X,L412z,L421X),
XPS 15 (9530,L501X,L502x,L521X),
15z,XPS 17 (L701X)
M170,M1210,M1330,M1530,M1710
A 7.4mm to 4.5mm connection adapter is required for use with a DELL XPS 12,XPS 13,XPS 13 MLK.
Compatible models:
Dell Inspiron 1120 11z 1110 1546 1720
Dell Latitude E4200 E4300
Dell Alienware M11x/R3

D09RM ac adapter not working?

When the D09RM AC adapter (charger) fails to work, it will neither charge the laptop(adapter) battery nor provide power to operate the laptop(adapter) without battery power. Power issues on a laptop(adapter) are compounded because a laptop(adapter) has two power sources: AC adapter (charger) & battery. When D09RM power is not available, power is provided by the laptop(adapter) battery.

If you’re having issues with your D09RM adapter not charging your laptop(adapter), please try to follow these steps to solve the problem.

Inspect the D09RM AC adapter, cables and adapter (DC) port on the laptop(adapter) for damages

Check if the indicator light on the D09RM adapter is lit.

Unplug the AC adapter from the wall outlet.

Unplug the D09RM AC adapter from the laptop(adapter).

Check the AC adapter and cables (including the power cable) for signs of physical damage or overheating.

Check if the pin inside the plug or D09RM adapter port is bent, broken or damaged.

Verify the wall outlet is working:

Unplug the D09RM AC adapter from the wall outlet.

Connect another device to the wall outlet to verify if the wall outlet is working correctly.

Try a known-good wall outlet.

Plug the D09RM AC adapter directly into the wall outlet.

Drain remaining power:

Unplug the D09RM AC adapter from the wall outlet.

Disconnect any external peripherals connected to the laptop(adapter).

Press and hold the Power button for 30 seconds to drain a residual power from the laptop(adapter).

Plug the D09RM AC adapter into the laptop(adapter).

Turn on the laptop(adapter). If your laptop(adapter) still can’t strat, you need a new D09RM ac adapter.

11 Tips On Choosing The Correct D09RM laptop(adapter) Charger

It is not difficult to find the correct D09RM laptop(adapter) charger if you are ready to do a little research. Many people end up purchasing wrong laptop(adapter) chargers from the internet simply because they do not set aside enough time to look for the correct information. To help you in this regard, the following is a compilation of some important tips on finding the right D09RM charger for your laptop(adapter):

1. Before you make up your mind to buy a new charger, make sure you check the D09RM laptop(adapter) power supply and detachable wires for any faults. Just make sure that your charger is indeed faulty before you decide to place an order either online or offline.

2. laptop(adapter)s in a series may or may not have the same D09RM charger. Different models manufactured by a company have different specifications. Always keep the compatibility aspect in mind while making such purchases.

3. You must scout for the correct information. Finding laptop(adapter) chargers can be an extremely convenient process if you have the right information. This information can be found on your laptop(adapter) or the old laptop(adapter) charger very easily. Note down the manufacturer’s information labelled on your old D09RM charger. Use this information when you perform an online search.

4. If you are going to purchase from a local computer or electronics store, look carefully at the list of all computer models compatible with a D09RM charger under consideration. laptop(adapter) chargers generally come with a list of various laptop(adapter) makes.

5. Turn your laptop(adapter) face down and note the product information stamped by the manufacturer. These specs are provided on different parts of the laptop(adapter). Look for the product specification stamp that reads something along the lines of ‘AC Adapter.’ That is where you can easily find the correct model number of all chargers.

6. Make sure you have the right pin connectors while purchasing a D09RM charger for your laptop(adapter). These pins should be compatible with your existing wall sockets. Charging your laptop(adapter) can be a bother with a new charger if its pins do not fit into your room’s wall sockets.

7. You can find a laptop(adapter) charger with additional features. These days, it is possible to find chargers that trip the laptop(adapter) power supply as soon as there is a voltage fluctuation. These chargers are great, especially if you live in an area where power fluctuations are frequent.

8. It is possible to find a universal charger nowadays since many manufactures are selling one-for-all chargers. These laptop(adapter) chargers are fine as long as you find one that is compatible with your laptop(adapter).

9. Always check the voltage, input, and output before buying any charger. These details are labelled on the product packaging. Make sure this information is in keeping with the specs of your laptop(adapter).

10. Do not be tempted by unbelievably low prices on some websites as you may end up placing an order for a duplicate product. Always buy laptop(adapter) chargers from a reputed or professional site.

11. In principle, the more authentication the more reliable the adapter is. Don’t buy a compatible D09RM adapter with few certifications, it will hurt your machine.

How to do when ac adapter buzzing noise?

Buzzing in an AC adapter can mean a number of things, but often it is related to a damaged adapter, poor grounding or phasing issues with your power. Figuring out exactly why your AC adapter is buzzing will probably require some troubleshooting, but in the end you can probably isolate the problem and get rid of the frustrating noise.

Check for any obvious damage to the adapter. If any of the outer rubber coating has been damaged so that the conductor inside is exposed, this could allow interference to enter the current and cause a buzzing sound. Untie any knots if the cord has become knotted. Make sure that the connection where the cord meets the actual box adapter is still intact; this sometimes can become damaged and make a poor connection.

Repair any damage with electrical tape. Cover all exposed areas.

Plug the AC adapter into the same outlet as the other equipment you are using. Some apartments and houses have multiple phases of power that can create audio interference if mixed together, so running everything off of the same phase might get rid of the buzz.

Run your equipment through a surge protecting power strip or, if necessary, a power conditioner. Audio and video equipment is especially susceptible to interference caused by ground looping. A power conditioner will smooth out the current and protect your equipment from any peaks or spikes in current.

Why laptop adapter light blinks?

Question description:

A few days ago studying in the UH library, I noticed my laptop all of a sudden wasn’t receiving power and the light my AC adapter was blinking. After unplugging it from the laptop, that is, from the power jack, the AC adapter’s light turned solid green again. Then, as you might guess, after plugging it back into the laptop’s power jack, the light on the adapter would again start blinking and no power would circulate.

After brief research, I learned that I could take the battery out and press the power button to relieve all currents and that after that everything would work fine. Well, I did get it to work, however not my this method. After trying it several times and failing, I figured I’d just use the laptop without the battery, since it powered the laptop without the battery in it. Then the idea of just placing the battery back in the laptop while I was receiving power came up. So as the laptop is working I placed the battery in and SUCCESS the AC adapter no longer was blinking and it was successfully transferring power to the laptop and battery.

Now, however, several days later, in a similar library, I noticed I wasn’t receiving power again. When I unplugged the adapter from the laptop, the light on the adapter continued to blink. This was not the case previously. Previously, the light on the adapter would only blink when plugged into the laptop and would turn solid green when I disconnected it from the laptop. Now however, without the laptop ever coming into the picture, the AC adapter, by itself, not plugged into anything other than the wall, constantly blinks. The laptop receives no power, and I’m stuck.

Also, used my sisters AC adapter, she has a similar laptop, and everything worked fine. Meanwhile, my AC adapter, while plugged into the same power jack in the wall, just blinks.. and blinks…

someone help.

Answer:

The AC adapter’s light turned solid green means ac adapter have a solid out put. When the light blinking, it means that the adapter is trying to output again and again, and it keeps flashing to indicate that the output was failed. You need check laptop dc jack or a MOSFET on laptop motherboard. Usually one laptop model develops this kind of fault and then many of the same model start to fail.